5 Tips For A Better Instagram Photo
I love Instagram. It’s my absolute favorite social media platform and I’m not alone. There are over 600 million Instagrammers. Of that 600 million, 400 million are active every day, and 35% of those check it several times a day. 95 million photos and videos are shared daily.
With so much activity, it’s understandable that we all want to bring our A game to the platform, whether we use it for business or pleasure. So today, I’m sharing my personal secrets and tips to posting better photos. This is perfect for those who primarily use their iPhone and are always on-the-go (like me)!
USE THE CAMERA FUNCTION.
Never take photos using your social media apps, always use your camera function. Photos look better if they’re shot uncompressed, you’ll get large high quality pics that are easier to edit later on.
LIGHTING IS EVERYTHING.
Natural light is always best. I love early mornings or later evenings when the sunshine isn’t as harsh, or find yourself a bright sunny window to shoot next to if you’re capturing stills and flat lays. Try keeping the light behind the phone/camera (behind the direction you’re shooting) so that it won’t look overexposed.
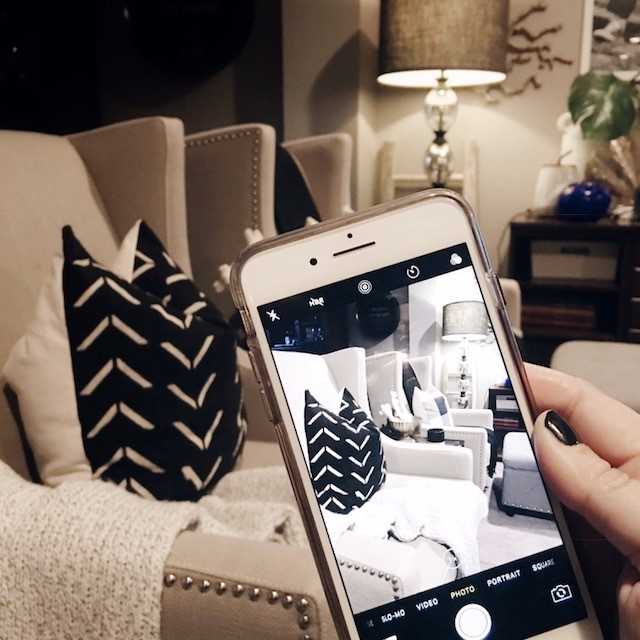
This photo was shot right next to a window and I love how crisp it looks. That filtered natural light can really help you bring out the beauty in even the simplest shots.
PAY ATTENTION TO COMPOSITION AND SYMMETRY.
Consider your frame, your focal point and the natural lines in the photo. Find interesting and alluring ways to shoot… don’t just shoot with your focal point in the center, think of the grid and consider if the picture will look more interesting with the subject off to the side or at an angle.
Play with portrait mode too if you want to bring focus to a single object or area while blurring busier background.
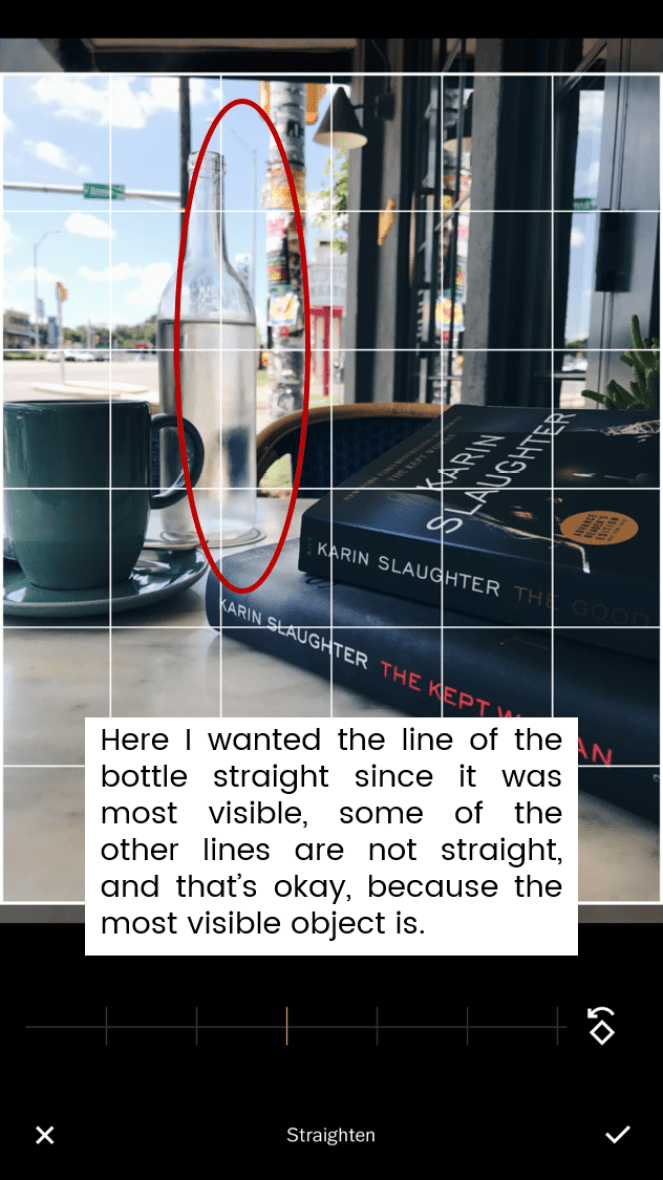
Also, make sure to look at the natural lines of the photo. Is there a pillar, a doorway, or the side of a table showing? Is there one more visible line that you straighten so that it feels symmetrical?
FIND YOUR FILTER.
While I believe you don’t have to fully curate your Instagram to cover only one topic or one theme (because hello, real life!), I do believe in aesthetic. You want your feed to have mood and personality. Do you want your photos bright and light? Dark and moody? Focused on a particular palette of colors? What’s your jam and how are you accomplishing that? Filters go a long way in helping to establish mood.
Never use the filters on Instagram, they take away resolution and aren’t as crisp as many others out there. I use VSCO exclusively for my filters. There are a ton of options. Because I like my feed a little moody, I tend to use HB1 or HB2, but play around with what they have and find that amazing filter that’s right for you. But make sure you don’t overdo it with filters… you want your photos to look as natural as possible. I always lower the intensity of the filter. Always. You can always play with exposure and ambiance later.
In the picture below, I used HB1 (dialed back), and I loved how the shadows and light played together to capture a really interesting early morning shot.
EDIT WELL.
So for most, just using VSCO is going to take you far. You can really improve the quality of your Instagram photos with just that app. But here’s my process (in order):
- VSCO for filter, exposure and straightening/symmetry.
- SNAPSEED for overall perfecting. I start with TUNE IMAGE and play with Ambiance, Highlights and Shadows. Then, I got to DETAILS and make minor adjustments in Structure and Sharpening.


- Lastly, I sometimes use DARKROOM if there is an oversaturation of a certain color. For example, I hate when wooden surfaces look too yellowy, so you can adjust to dial back hues/tones.


One last tip, if you ever have an object you want to remove from a photo, you can use the RETOUCH app… just be careful because you don’t want your pic to look wonky in any way!
Now go out and live life joyfully, capturing those amazing photos along the way!


6 Comments:
Leave a Reply
On Instagram


Vilma Iris © Copyright 2024
Designed and Built with  by Priceless Design Studio
Natasha Tomic said:
It just shows you that you CAN teach an old dog new tricks! 🙂 This was super useful, lovely, and I just found two new apps to download. I would also like to recommend Enlight. I use it for most of my pics and I love it. Worth getting the paid version, too.
vilmairis Post author said:
Ahhh thanks my friend! And I will check out Enlight!!!!
Danielle Rocco said:
Congratulations on your new look! LOVE your new website and all your new fun fabulousness! Thank you for the photo taking tips. I’m always trying to figure out how to take a Insta worthy photo! XO
vilmairis Post author said:
Aww thanks so very much!
Roxana Yoss said:
Thank you for these wonderful tips!! I’ll definitely be using some of these apps and tips that you’ve shared with us!!
vilmairis Post author said:
Yay! I hope it’s helpful!